|
||||||
|
||||||
|
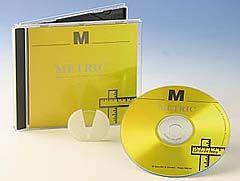
With this software package on CD ROM, you obtain a comprehensive program which, particularly when combined with our powerful Superscope video microscope, permits measurements of all kinds in a video live image. Following the easy installation on your PC or laptop, you can select the language you require: German, English, French, Italian, Spanish, Portuguese and Dutch. A more detailed description of how the Metric software works is given on the following pages. "Optional Modules" extending the measurement possibilities and "Special Solutions? are helping to solve everyday measurement problems. Demo-software to download |
|
|||||

|
(Fig.
1) Calibration: Focus the calibration disk and measure the greatest distance on the scale. Enter the value determined in the "Calibrate measurement” window. |

|
(Fig.
2) Point-to-Point: The software calculates the distance between two points selected by mouse clicks. The value appears in the image and in a table if desired. |
|||
|
How
Metric works Before the first measurement can be made, the system has to be calibrated. To do so, align the CCD camera system on the calibration disk and focus it (Fig. 1). Now count the number of lines. Click the mouse on the menu item "Calibration" and a window opens in which you enter the number. As this figure is determined by the magnification power of the microscope, it's advisible to store it in a calibration list, noting the degree of magnification it has been derived from. All lenss used can be stored in this list, together with the accompanying calibration (Fig. 10). This means that you do not have to make a new adjustment every time you change from one lens to another. Simply select the calibration corresponding to the lens from the list. After the target measurement area has been focussed under the microscope of our Cellcheck system, the menu item "Measure" in sub-item "Distances" opens the following measurement options: The "Point-to-Point" option (Fig. 2) can be used to measure a distance between two points selected by mouse click. A line indicates the distance measured and the figure is displayed. For a more exact positioning of the measurement points a so-called pixel lens can be activated in all measurement options, which magnifies a section of the measurement area. This only works, however, if the image has been stored. |
||||||
|
Fig.
3) |

|
(Fig.
4) |

|
|||
|
With
the "Point-to-Line" option, the PC always calculates
the distance of the selected point at a right angle to a pre-defined
line. The "Circle centre-to-Circle centre" option (Fig. 3) permits, for example, measurement of the centre-to-centre distance between two drill holes. To define the whole circle, just click three points on the circumference of the each drill hole. After the two circles have been defined, the system calculates the distance between the centre and displays this by means of a line on the image. Using the same procedure, the "Circle-to-Line" option (Fig. 4) is used for measuring the distance at a right angle between the centre of the hole and a line selected by mouse click. |
||||||

|
(Fig.
5) Angle measurement: Metric calculates the angle between two selected lines. Either the three or the four-point measurement method can be used. To calculate the angle, the lines in the image do not even have to touch. |

|
(Fig.
6) Area measurement by drawing a polygon. Trace around the irregular area to be measured with the mouse, and click at each turning point (The "K” has an area of 1.7 mm2). |
|||
|
With
the sub-item "Angle" (Fig. 5), angles can be measured
by the three or four-point method. To do so, you simply place
the measuring points required on the selected lines. The angle
is shown in degrees. In program item "Area measurement" (Fig. 6) even the areas of the most irregular two-dimensional objects can be measured exactly by drawing a polygon with the mouse. To do so, the user traces the area to be measured with the cursor and clicks at every turning point. As soon as the polygon is closed the result appears on the image and is listed in the table. To determine the area of a circle (Fig. 6), just click three points on the circumference. After the third point has been marked, the program then calculates the area of the circle automatically. In sub-item "Radius" the software calculates the radius of the circle, again after marking three points on the circumference. A "Counter" can be activated to count individual elements. The number counted increases in the table with every mouse click and the counted elements are marked automatically. |
||||||
|
(Fig.
7) |

|
(Fig.
8) |

|
|||
|
For
serial measurements, the software automatically creates a table
(Fig.7) which can be saved in an ASCII or TXT file. If Excel
is installed on the computer it is possible to have the measured
values entered automatically in the table program. The "References" menu item provides tools, such as grids (Fig. 8) tolerance rings (Fig. 9) and gauges. The standard package also includes a Multiform comparison mask. This can be generated to suit your particular requirements, and facilitates the inspection of structures in series production. |
||||||

|
(Fig.
9) Tolerance rings: facilitate, for instance, the detection of faulty drill holes, thus ensuring dimensional accuracy of production. |

|
(Fig.
10) System selection: The calibration of each lens is stored in a protected file. When changing lenss, it is only necessary to choose the respective calibration. |
|||
| For fast comparison measurement, the Metric program package has been augmented by the "DoubleCheck" function. This allows the screen to be split vertically in two halves (Fig. 11) so that differences in materials can be easily detected. The extra function "Incremental measurement" determines the circumference of any polygon (Fig. 12). | ||||||
|
(Fig.
11) Doublecheck: In this function the screen can be split vertically in two. Thus, changes or differences in individual workpieces become obvious and can be documented. |

|
(Fig.
12) Incremental measurement: This function automatically determines the circumference of any polygon and stores the results in a list. |

|
|||
|
The
"Multiform" window (Fig. 13) allows a comparative sample
to be generated. Circles, tolerance circles, squares, rectangles
and even-legged triangles can be arranged in terms of size and
position, with and without offset, in such a way that the sample
can be quickly monitored. The "Overlay" function (Fig. 14) can be used for overlaying a stored photo and a live picture. Every deviation of the "live" object from the stored picture is immediately noticeable. |
||||||

|
(Fig.
13) Multiform window: It enables rapid comparison of the measuring sample with a geometric form generated by the program, which can be moved and rotated with the mouse using the cross wire. |

|
(Fig.
14) Overlay Two images are overlaid – the differences become clear. |
|||
|
Storage
formats, intermediate storage, labelling functions, choice of
colour for the measuring lines, a choice of standard steps and
fonts as well as a Twain interface makes it easier to edit pictures
and prepare seamless documentation. The shown pictures have been made with different kind of equipment. With the Superscope magnifications between 4-80 can be reached and loaded to a PC by the framegrabber The videocable is not included due to individual custom-length. download: |
||||||


